There is a work around, actually two, one is to create an alias virtual COM port programmatically and the second to use the Printer object (both are not within the scope of this blog). After several trials I was successfull and decided to move to LabView.
One critical and important detail is to properly configure the Printer processor to be used, for some reason if you select the model printer you have installed (in my case Zebra GK420d) as the defaul printer this will not work! ZPL code will not be interpreted and will print the code itself.
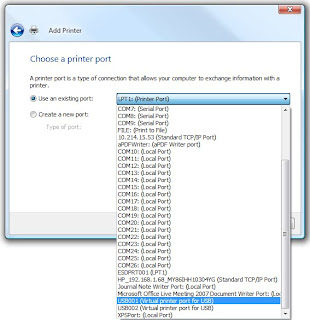
First thing, go to Start->Control Panel->Printers and click on Add a Printer. You will select Add a local printer on the popup window. You will look for the port in which your printer was configured, usually USB001 (see picture below) but if you had already another device using this then make sure you select the right one or your application will not work.
 Continue with the wizard installation, when prompted to select the printer driver make selection for Generic - Generic / Text Only and finish the installation, make sure you make this the default printer.
This is fifty percent of the work, at this point you are maybe asking yourself how you will be sending the ZPL to the USB virtual port, you have maybe already tried many different things starting with VISA which will not work for sure because this virtual port is not listed. Well there is an option and for this you will require to have installed the "REPORT GENERATION" TOOLKIT VIs, if you haven't done this find your TOOLKIT installation disk to install it. Below you will find an example of my application, there you see how the report generation VIs are used for this purpose.
One last thing, download Zebra Setup Utilities (the link provided is for model GK420d) and configure your label size, the speed and darkness of printing (this will impact on your print quality), printing method (direct or thermal transfer), the media type (how the printer knows when it reached the next label after print) and the media handling (tear off, peel off, cutter, etc). You must do this to have the print design exactly located within the size configuration of your label, otherwise you will be wasting labels or have incorrect printouts.
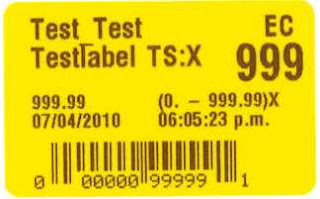
The end result with this method is the following Fail Label, in my case this is a thermal label with the following dimensions: Width = 1.57in Height = 1.00 in.
NOTE: I have this solution in Visual Basic 6.0 TM if you needed please contact me.


1 comentario:
Hola, me encuentro con la necesidad de imprimir en una zebra GK420t a una etiqueta de 31.8 mm ancho x 22.2 mm alto, por lo que creo que tu código podría ayudarme, me lo puedes proporcionar?
Gracias y saludos
Publicar un comentario